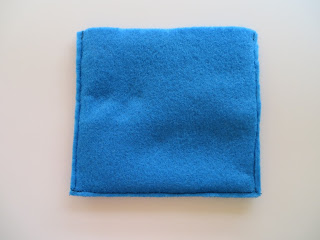
When someone loses a tooth, it’s super exciting. What would make it even more exciting is if there was a monster to keep their tooth safe in its mouth until the tooth fairy comes! These monster pillows have a pocket to hold a tooth and to hold some money in return, and are flat enough to stick under your pillow.
When I was writing this tutorial, I realized it was the perfect project for a beginner. It’s really not that hard, because it’s basically just straight lines with a machine, and then just embroidery. Plus, the turn-out is really rewarding! If you are looking for a project to get you or a friend into sewing, I think this would be a great one.
 I would rate this tooth pillow a yellow crayon, which is called "eh". To see the rating key, look at the side bar.
 I would rate this tooth pillow a yellow crayon, which is called "eh". To see the rating key, look at the side bar.
 Materials:
- One sheet of felt whatever color you want (I chose blue.)
- Some white felt (you don’t need much)
- Some black felt (you don’t need much)
- Some thread that matches the color of your main felt
- Some black embroidery floss
- Some white embroidery floss
- Pins
- Needle
- Scissors
- Ruler
Not Pictured:
- Sewing Machine
- Stuffing
(There was yarn in the photo, but you don’t need any. I was planning on making hair, but it didn’t work.)
How to:
- Cut two pieces of your main felt 5 1/4 inches by 4 7/8 inches.
- Cut one piece of your main felt 5 1/4 inches by 2 1/8 inches.
- Now for the teeth. Cut a row of teeth out of white felt. They should all be connected and you should leave a strip of felt at the bottom. (Just look at my picture.) You might want to make a template (see picture) so that all of the teeth are the same size.My template:
- Now pin and sew the strip of teeth to the top of the piece of felt 5 1/4 inches x 2 1/8 inches.The front:
The back: - Now make a sandwich of the three felts, with the smaller piece in the middle.Lay one of the 5 1/4 inches x 4 7/8 inches pieces down.
Then lay the piece with the teeth down on top of that so the bottom edge lines up with the bottom edge of the first piece.
Then lay the other 5 1/4 inches x 4 7/8 inches piece on top of that, with the bottom edges lining up. - Pin and sew along the bottom and side edges, BUT leave the top edge open!!!
- Flip it right side out, so that when you see the pocket, the seam isn’t on the teeth. (If you see the side with the seam on the teeth, flip the pocket to the other side.)
- Iron.
- Cut out two white circles (or ovals) and two smaller black circles for eyes.
- Lay the eyes on the felt where you want them to go.
I had fun playing with the eyes! :)
Normal Monster (this is the design I chose)
Angry Monster
Sad Monster
Crazy Monster
"O-kay mom!" Monster
- Using black embroidery thread, hand stitch the black circles onto the white using the blanket stitch.
- Using the white embroidery thread, stitch the eyes onto the monster using the blanket stitch.
- Flip it back inside out and sew it with the machine about halfway closed. (I know I went over half way, but since felt is so stiff it’s really hard to flip it right-side-out with such a little hole.)
- Flip it right-side-out and stuff it. Then hand stitch it the rest of the way closed.
And that's it! Hopefully this monster adds to the fun of losing a tooth!!
~Hannah
~Hannah


No comments:
Post a Comment